Assigning People to Jobs
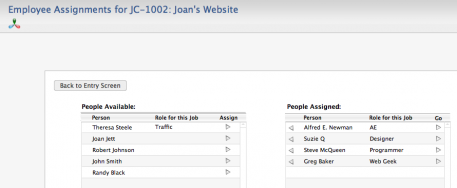
On the Jobs Entry Screen, in the People tab, you see a plus sign within a circle. That’s the button that takes you to the Employee Assignment screen. Click on the plus sign button to add someone to the list or to edit the list.
Although it is optional, you now have the ability to assign your employees and freelancers to jobs so that they can track the jobs on which they are working, as well as the tasks to which they’ve been personally assigned. The Employee Assignment screen( shown below, click to enlarge) makes assigning people a snap. Now you can view who is on a job from the Jobs home screen. And, when people fill in Timesheets, only their jobs appear as options rather than the full list of all active jobs. This is especially advantageous in larger firms.
As a default, Studio Manager is delivered with this option disabled. This is a change from Studio Manager 10 where you were required to assign jobs before you could assign tasks. The change was made because it is not possible to assign jobs when accessing Studio Manager from an iPad, iPhone or iPod touch.
To enable the feature that links staff to jobs, follow these instructions (similar to those found in the Setup and Installation Guide):
Setting Up Job Assignments
Preparing Studio Manager to assign jobs to specific employees requires setup in Timesheets and Contacts. Doing so means that when you enter a new job, you may assign the people you want to perform that job. By doing so, you save time for everyone working on the job, because Studio Manager can shorten job value lists to show only those jobs relevant to the current user, such as the job list used when entering time.
Studio Manager 11, unlike version 10, makes the assumption that you do not wish to assign people to jobs. If you have a shop with many jobs, each of which is worked on by a limited number of employees, then you will want to change the default configuration. To make this configuration permanent, make the changes on the file when it is opened in FileMaker Pro or Advanced on the server with full access privileges. Here’s how using FileMaker Pro 11:
- Open Timesheets and enter Layout mode.
- Click once on the Job ID field to select it. This field is in the portal.
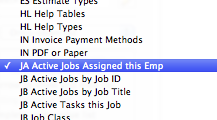
- Click on the Data tab in the Inspector and notice which value list is already selected for this field: JA Active Jobs by Job ID (the SM11 default).
- Open the Value list menu by clicking once on the double-arrow menu icon to the right of the name.
- Choose the value list just above this one: JA Active Jobs Assigned this Emp.
- Now when you enter Timesheets, you will see a list of just the active jobs assigned to the current employee. When using the Job Assignment feature, the value list assigned filters the job list pop-down to only show jobs that are assigned to current users.
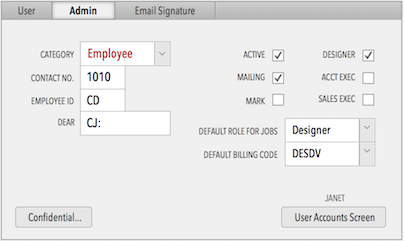
- Return to Browse mode and navigate to Contacts. Enter Layout mode, click on the Employees tab and repeat the steps above for the Job ID field in Today’s Timesheet.
When this task is complete, quit out of FileMaker Pro and relaunch Studio Manager from the server. You are now ready to assign jobs to your staff.


{ 0 comments… add one now }
You must log in to post a comment.