
Manage Database Function
Several of the steps in setting up Studio Manager require that you enter a mode that in FileMaker Pro is referred to as “Manage Database”. Because anything changed or added in this mode seriously affects how Studio Manager works, the highest level password access is required. This feature used to be called “Define Database”.
Precaution: Whenever you are customizing or making any change to fields, tables or relationships in Studio Manager, be sure to make a backup first.
The Manage Database button is hidden

In case you are wondering why we hid this button, it is so that only those with sufficient access to Studio Manager and a working knowledge of FileMaker Pro will ever attempt to use it. You can find this button in two different places in Studio Manager: Jobs and Billing Codes.
Manage Database from Jobs
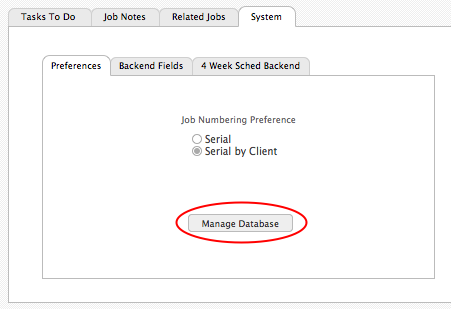
Open Jobs from the PLACES menu on any screen. Click once on Jobs. This takes you to the main tab in Jobs.
Now, click on the System tab and then the Preferences subtab.
Alternately, you can use the Manage Database button in Billing Codes.
Getting to Billing Codes – 1
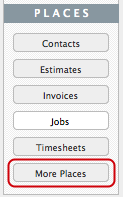
Since the Define Database button is located in Billing Codes, before you can proceed you must open that table. From the PLACES menu (on most screens) choose More Places, the button at the bottom of the list.
Getting to Billing Codes – 2
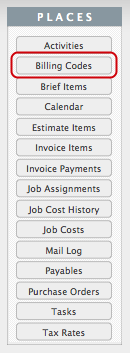
When you click on the More Places button, it causes a new window to open. This is where you will find the button that will take you to Billing Codes.
Click once on the button for Billing Codes.
Please note: If you open More Places by mistake, you must close it by clicking on the Cancel button at the bottom of the list. Although the close, minimize and zoom buttons appear in the title bar, they are disabled.
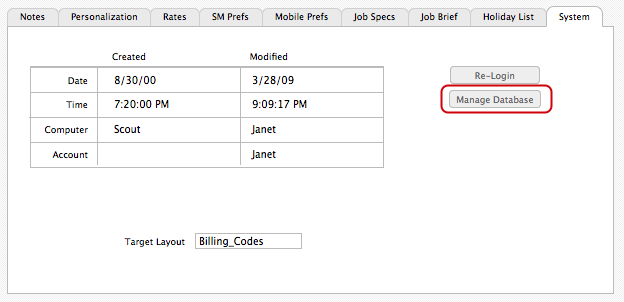
The Manage Database button in Billing Codes
The button itself can be found on the System subtab in Billing Codes.
It does not matter whether you open Manage Database from within Jobs or Billing Codes. As long as you have the highest level of password access, you will be able to get into the guts of Studio Manager.
The Manage (Define) Database Window
The Manage (aka Define) Database window opens to the Jobs table if that is where you were when you clicked the Define Database button. The same is true if you chose Define Database from within Billing Codes.
For purposes of setting up Studio Manager, you want to make sure that you are viewing Fields.
Changing Tables
If the field you want to customize is in another table, then choose that table from the list.
Select the Field
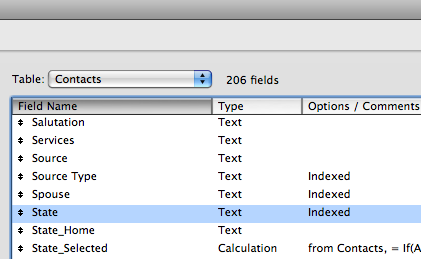
Scroll down (if necessary) to the field that you want to edit. Highlight the field name and click on the Options… button (not shown) or simply double-click to open the Options dialog box.
Setting an Auto-Enter Field Option
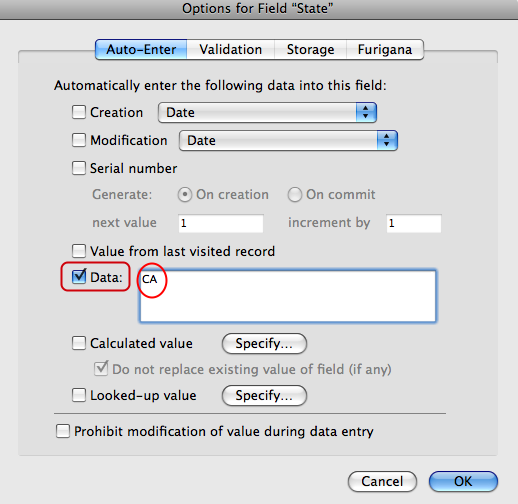
Depending on what modification or customization you want, select the appropriate checkbox and then set the value, or as in the example shown, specify the data you wish to to Auto-Enter. For the purposes of setting up Studio Manager, the only option that you will use is the one to either enable or disable Auto-Enter. In the example, the State field in Contacts is being set to “CA” (California) because that is where most of this user’s contacts are located.
When you are done, click OK to close the dialog and then OK [again] to close Define Database.


{ 0 comments… add one now }
You must log in to post a comment.