Setting up Contacts
The contacts management portion of Studio Manager is the Contacts table. This is where you keep track of all the people and companies you work with. Some of the settings for Contacts are made directly in that module and others, as you are about to learn, require that you enter the guts of Studio Manager. Because data from Contacts flows to other modules, it is important that these entries be correct. One of the cool features of Studio Manager is that you can view and access huge amounts of information about your job flow right from within Contacts.
Have a Default City?
You can choose to have Studio Manager automatically enter the city whenever you create a new record in Contacts. If more than half of your contacts are in one city, this may be a good idea. You must have the highest level password access in order to set this up.
To set auto-enter for City, first click the Define Databas button on the System tab in Billing Codes or Jobs, then…
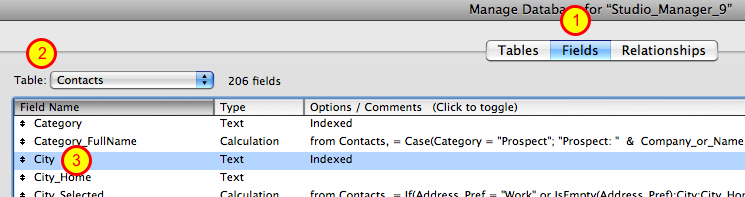
1. Select Fields from the Tables/Fields/Relationships bar at the top.
2. Select Contacts from the list of tables.
3. Scroll down to and double-click the City field (or click once on city and then on the Options... button).
See the Define Database lesson in the Appendix for more information.
Setting City to Enter Automatically

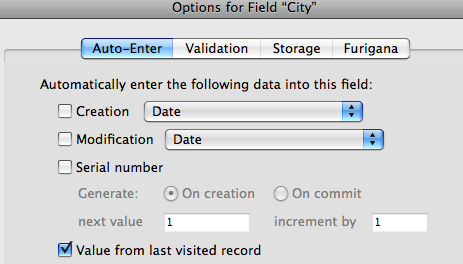
Either method opens the Options dialog box for the field “City”.
1. If necessary, click on “Auto-Enter”
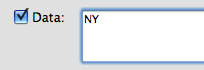
2. Check the box next to the label “Data†and enter the name of the city in the field to the right.
3. Click OK to close the Entry Options window. Then click OK again to exit Define Database.
Setting City to Use the Previous Entry
Another auto-enter option for auto-entering the city name is to use “Value from previous record†also in Entry Options. If you enter existing clients or vendors one city at a time, this can be handy. When you create a new record the city entered in the previous record will automatically be entered into the city field.
You’ll probably want to turn this option off once you’ve finished your initial entries. At that point, just go into Entry Options for City and uncheck the “Value from previous record†checkbox to turn it off.
Setting a Default State
Studio Manager can also be set to automatically enter the state abbreviation into the State field when you create a new Contact record. If you have an out-of-state client, change the state to the correct value.
To set auto-enter for State, open Define Database… on the System tab in Billing Codes or Jobs. Make sure Fields is selected at the top. Then…
1. Select the Contacts table.
2. Scroll to and double-click the State field.
3. On the Entry Options dialog, check Data and enter the 2-letter abbreviation for the state you want.
4. Click OK, OK (yes, that’s OK twice) to exit.
Adjusting the Value Lists
You may wish to change the Phone Label choices for the four phone label fields: Phone1 Label, Phone2 Label, Phone3 Label and Phone4 Label. You will almost surely want to change the Industry Value List.
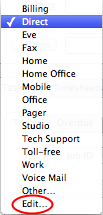
To add, remove or move an item in one of these pop-up menus, select Edit… at the bottom of the pop-up menu. This opens the Value List.
Editing the Phone Labels Value List
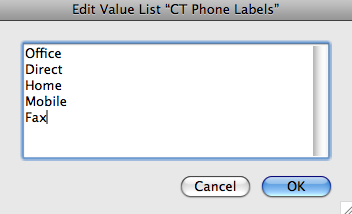
Make any changes you desire. If all you want to do is to enter something different, but you don’t want to actually change the list, then select Other.. and type in the unique value.
All pop-up menus and lists that can be easily edited include the Edit… option at the bottom of the list. Only pop-up menus also include the Other option. This is because you can freely enter a unique value directly into a drop-down list field (so it isn’t needed).
Changing the Default Billing Rates
You set the default billing rates in the Billing Codes table. See instructions in the lesson on Setting Up the Billing Codes Table for more details. These rates are automatically entered whenever you create a new clinet or new prospect record in Contacts.
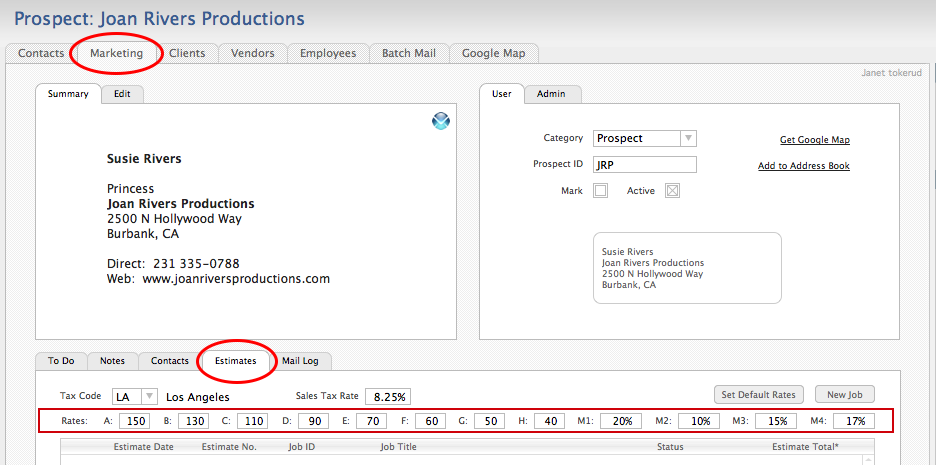
Once the record exists, you may change the rates for any prospect or client. Of course, changes made in Contacts will only be used for estimates and jobs that you create after you have made the adjustments. For that reason, it is recommended that you adjust the rates while you are creating the record. Rates are found on the Jobs subtab for Clients and on the Estimates subtab for Prospects (on the Marketing tab).
Filling in Your First Record
Studio Manager opens the first time with a few records already created. 1001 to 1003 are vendor contacts for Tokerud Consulting Group, the developers of Studio Manager. We put ourselves in first because we want you to know our names and how to contact usl
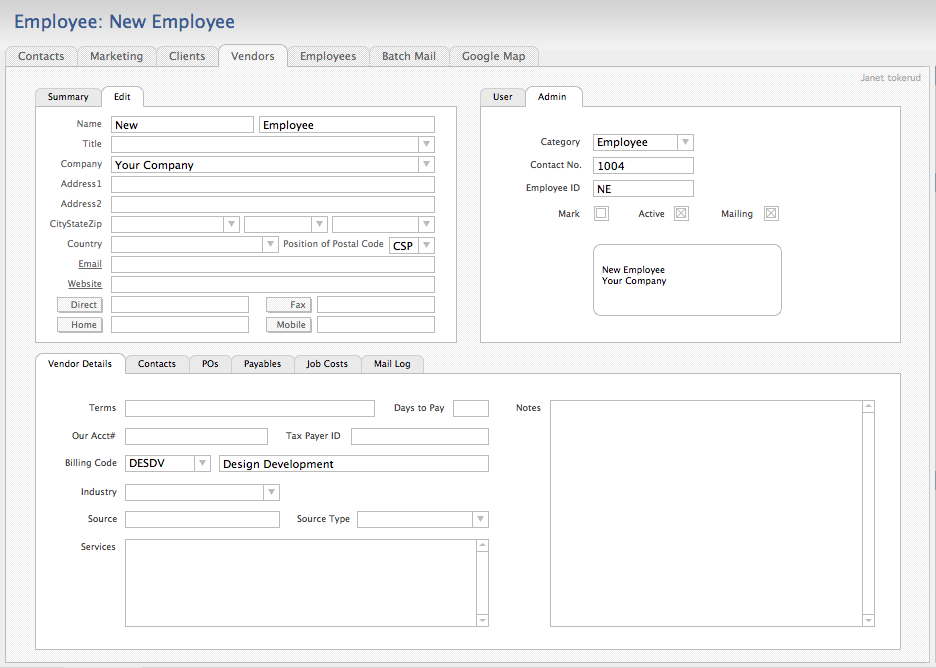
A sample Employee record is blank except for the name “New Employee.” Before you enter any new records into Contacts, decide who gets to be the first employee! Replace the placeholder names and fill in the other fields. Once you have entered your first real employee (who might be the boss, owner, manager, CEO or you), you are ready to enter the rest of the people who work with you.
Adding Your Data to Contacts Manually
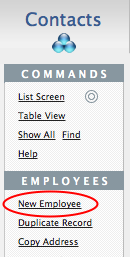
Now that you have configured the Contacts table, it is time to enter your contacts. Start with your staff. Use the Employees tab. To enter them manually, begin by clicking on the New Employee button under the button bar labeled EMPLOYEES.
Each category of contact contains some unique fields
Be sure that you are on the correct tab before choosing to create a new record. Each category tab contains a New… button specific to that category of contact. Data is entered on the Edit tab and most easily viewed on the Summary Tab. Enter a Contact ID on the User tab and check the tabs on the lower half of the screen to enter details unique to this contact.
Preparing Contacts for Importing
Chances are really good that most of your contacts, even your employees, are already entered into some type of database, most likely in a contacts management database like Apple’s Address Book. If your contacts are in a FileMaker Pro file already, then you are one less task ahead of the rest.
The first thing to do before importing contacts is to make at least one backup of Studio Manager. Please. It will just take a couple minutes.
Importing from Another FileMaker Pro file
If you are importing data from a FileMaker Pro table, open that table first and find all of the records that you wish to import. It is better to import contact data in small chunks rather than all at once. It will be easier to import each different category of contacts separately. Once you import the data, you can assign the appropriate category for all the records in the found set with a single Replace command. If you import all the contact data you have at one time and the import doesn’t include the category, you will have to set that field for each record, one at a time.
Exception: If you are importing from another Studio Manager Contacts table, this isn’t an issue because you’ll already have correct categories set and they will import.
Keep in mind that you need to have opened your older FileMaker file (even Studio Manager) in FileMaker 10 or 11 before running the import.
Importing Data from Text
If you cannot import directly from FileMaker into Contacts, then you will have to export a text file from whatever application contains the data. Study the export instructions for that program before proceeding.
Compare how the data is stored in that file or program with how it is stored in Contacts. You may have to be creative in some cases. Contacts stores the first and last name in separate fields for instance. What if your program stores them in one field?
The address fields in Contacts are also separate. Decide in advance which fields you want to import data to when the fields do not match.
Making a Text Import Easier
A trick we often use is to open the new tab-delimited text file with FileMaker. Then go into field definitions in the new FileMaker file and assign field names there to exactly match Studio Manager’s field names. If you do this, you’ll be able to take advantage of the Matching Names option when you get to the match fields screen. You’ll avoid the otherwise tedious process of dragging fields up and down the list to match them one field at a time.

{ 0 comments… add one now }
You must log in to post a comment.